Python is an incredibly powerful server side scripting language that can be leveraged for SEO. In this post, I am going to provide a step by step guide on how to use Python to automate URL Redirect mapping for a website migration.
Before I get started, I want to acknowledge the creator of this script (it wasn’t me) and their hard work putting it together. Below is their Twitter profile and a link to the script on Github:

Twitter: https://twitter.com/LeeFootSEO
Github: https://github.com/searchsolved/search-solved-public-seo/blob/main/migration_mapper/migration_mapper.py
Let me be clear: I am not trying to piggyback off his work. When I found his twitter thread about the script, there weren’t really any instructions on how to run it. If you’re new to running scripts with Python, it might be a little bit challenging.
I also struggled with getting the hang of running scripts with Python at first, so this is why I thought this would be a good post for anyone who wants to learn.
So let’s get on with it!
URL redirect mapping for website migrations
If you have worked client side as an SEO, you have probably worked on a website migration. Myself, I have worked on many website migrations, including two recent big ones for opg.com & wwf.ca. Both OPG and WWF went from using Sharepoint to WordPress as their CMS. Both times, I had to create a document which listed the old page URLs and their new page URL.Why do we need to do this?
As an example, with Sharepoint, the URLs were quite messy and often ended with an .aspx extension and of course, WordPress has clean URLs. For example, the OPG homepage was: opg.com/Pages/home.aspx and the new URL to the homepage was just opg.com. With a high profile site like OPG, there are a lot of links from other websites which direct to the OPG homepage, and other pages across their website. When those URLs change (switching from Sharepoint to WordPress), if there are not redirects put in place, traffic loss can occur from people visiting the old page URLs.
Not to mention, there could be internal links within the content that have not been switched over to the new URL, so enabling a redirect will also prevent users visiting dead links.
This is why setting up proper page redirects is so important! So, we map them all out in advance before the migration takes place.
The process of mapping out all the URLs 1:1 can be quite tedious, especially if there are thousands of pages that need to be migrated. In the past I have done this manually, and let me tell you, it is NOT fun.
With a high profile site like OPG, there are a lot of links from other websites which direct to the OPG homepage, and other pages across their website. When those URLs change (switching from Sharepoint to WordPress), if there are not redirects put in place, traffic loss can occur from people visiting the old page URLs.
Not to mention, there could be internal links within the content that have not been switched over to the new URL, so enabling a redirect will also prevent users visiting dead links.
This is why setting up proper page redirects is so important! So, we map them all out in advance before the migration takes place.
The process of mapping out all the URLs 1:1 can be quite tedious, especially if there are thousands of pages that need to be migrated. In the past I have done this manually, and let me tell you, it is NOT fun.
Using Python to automate URL redirect mapping and what this script does
What if I told you there was a way you could map out all the URLs for your migration by running a simple tool? Luckily, someone smarter than me created one! The migration mapping tool is very simple really. Here’s how it works: It takes two Screaming Frog exports, one from site A (old site or staging site), the other from site B (new live site). It reads in the .csv files and attempt to find the best matching URL based on defined criteria:- URL
- Page Title
- H1 header tag
Installing Python on Windows
To install Python on a Windows 10+ machine, it’s quite easy. The first thing you’ll want to do is to check to see if you already have Python installed. Open up Command Prompt and simply type “python –version”. If Python is installed, you will get a message showing the version that is currently installed on your machine. I am on a Windows 11 machine, and when Python is not installed, after typing python into the command prompt, a Microsoft Store window pops up asking if you want to install it.
- Pandas is a software library used with Python for data manipulation and analysis.
- PolyFuzz is a framework that uses Fuzzy String as a method for grouping and matching patterns with data.

Running the script
There are a couple things to note before running the script. The first is that you will need the tool Screaming Frog to export all the page URLs from both sites (old & new) into CSV files. If you don’t have a license to Screaming Frog, I highly recommend getting one, especially if you are crawling large websites. There is a free version of Screaming Frog, but it only crawls up to 500 URLs. Secondly, you will need ensure that those CSV files are placed into the directory specified within the migration mapper code. For example:
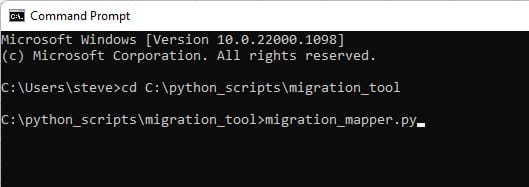
 Next, all you have to do is run the script by typing in: migration_mapper.py
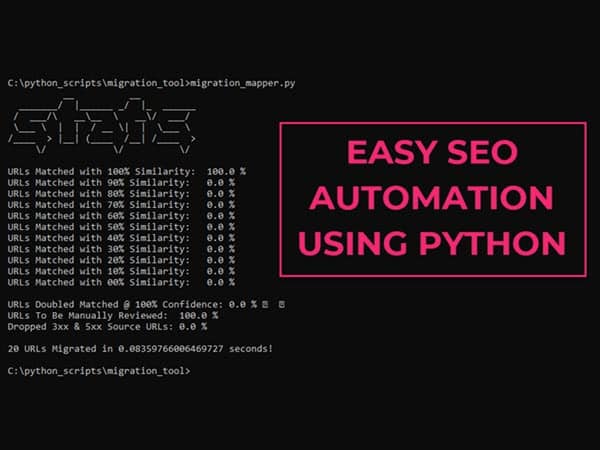
 And voila! If everything is setup properly, the script will run and let you know:

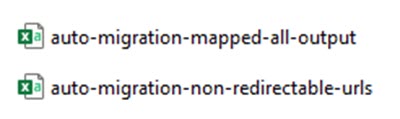 Check the results in both CSV files when you are done and if there are any URLs that were not matched for redirection, you can view them, then make a plan on how to address them.
In conclusion…
Python is awesome for SEO automation! With the right script, you can perform jobs that would have taken you hours, days, or even weeks to complete within a few minutes. I have a big website migration coming up on a website with roughly 5,000 pages and I am excited to put this tool to the test. If things go smoothly, I will share the results with an update. Thanks for reading!